Smartphone cameras are actually being improved upon as new phones emerge which makes it easier than ever to take professional shots. Although a lot of persons are still skeptical about this fact.
I for one have always had this doubt about using my Smartphone to take professional photos because, over the years, smartphone photos have not been the best photos for my outfit. The pictures are usually of low quality with combinations of battered lights from all angles that I wondered where the problem was. Perhaps, because I’m not a professional photographer or the phone camera. I still couldn’t figure that out until I stumbled on the few tips that I’d be sharing with you.
Remember a picture is worth more than a thousand words. Depending on the nature of your business, take, for instance, a fashion designer, the sharpness, and quality of your outfits or brands would definitely go a long way to convince a prospective client on the internet about your product without much verbal coercion. Marketing shots are meant to be appealing to clients and with your phone readily available than any other third party device is a way to go.
You do not need to be a professional photographer to get it right with your phone camera. All you need do is just follow the instructions below:
Light is a major factor to a professional photo. A great object in a poor light will always look bad. So if you must take a professional photo with your Smartphone, then take your best shots in soft natural light, that is, an hour after sunrise or an hour before sunset. But if you must take it outside in the harsh light in the middle of the day, then look for open shades and avoid the use of a flashlight or overhead bulbs.
Some photographers are in the habit of standing straight up while taking photos, this does not give a good image of the object, and the image becomes short or dwarf giving an awkward appearance of the object. To avoid this, position yourself down low or up high and turn on the gridlines to focus on the object before taking a shot.
Third party tools help a great deal: the use of editing apps give a unique finishing to the object. With an app like snapseed (highly recommended), Photoshop and more. Your picture gets the professional look that you have always desired.
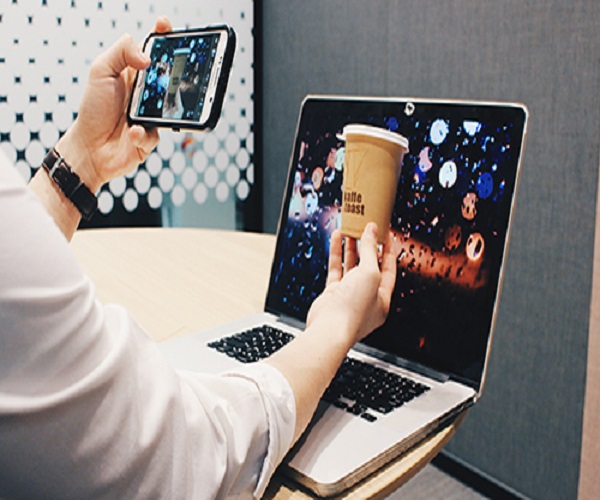
For a quicker process, turn on your desktop or laptop, choose a type of wallpaper that has the appearance of an image with excessive depth of field (that kind of image with blurred background but the focus image very sharp, it is the blurred background you need), get an object with a reflective surface, it could be a box-like object wrapped with a foil paper, place it before your desktop or laptop. Then place any object you want to snap and take a shot. Having done that, you can quickly crop the photo and you will have your professional photo ready.

